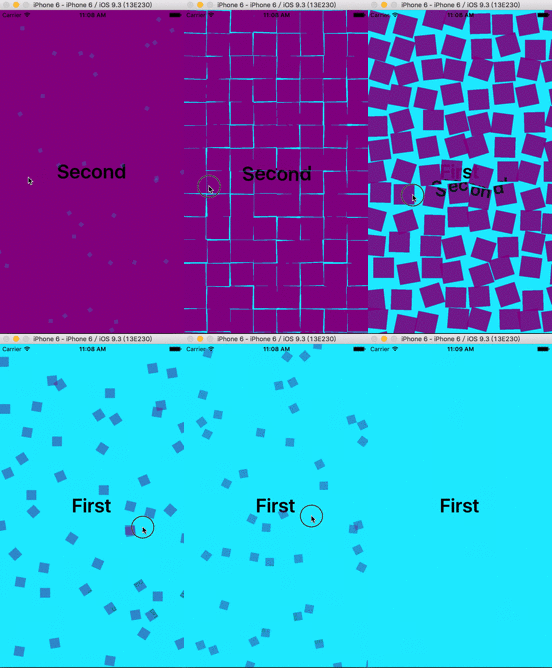
阅读源码后可以发现,和一般自定义转场动画一致,新建继承 NSObject 子类,遵守 UIViewControllerAnimatedTransitioning 协议。
实现两个代理方法:
- 返回动画持续时间代理:
1
2
3
func transitionDuration(transitionContext: UIViewControllerContextTransitioning?) -> NSTimeInterval {
return 0.75
} - 自定义动画代理:
1
2
3
func animateTransition(transitionContext: UIViewControllerContextTransitioning) {
// 自定义动画函数
}
参数 transitionContext 可以可以通过 func viewForKey(key: String) -> UIView? / public func viewControllerForKey(key: String) -> UIViewController? 取出转场动画的对应 fromView/toView / formViewController/toViewController 对应的 key 值:
1 | viewForKey: |
在 Explode 动画中主要在于屏幕快照的获取以及快照的区域分剪,核心代码:
1 | // 获取 fromView 的快照 |
剩下的就是对 每一个小块的动画处理,并在动画结束后调用:
1 | ransitionContext.completeTransition(!transitionContext.transitionWasCancelled()) |
这都很简单,难的是如何结合手势使用,这是最值得学习的地方,理解不深,可以 clone 源码 学习。
实现过程主要是对 UIPercentDrivenInteractiveTransition 的学习使用,和 IBAnimatable 的实现不同,我们采用 NavigationController 管理界面,在 FirstViewController 的 func viewWillAppear(animated: Bool) {} 内设置代理: navigationController?.delegate = self
(如果在方法: func viewDidLoad() {} 设置代理会导致转场取消后无法再次进行自定义动画转场)
实现代理方法:
1 | extension FirstViewController: UINavigationControllerDelegate { |
之后就是对 SecondViewController 内进行自定义手势 popViewController :
首先对 view 添加返回手势:
1 | view.addGestureRecognizer({ |
手势回调方法:
1 | func pan(edgePan: UIScreenEdgePanGestureRecognizer) { |
同样,在 SecondViewController 的 func viewWillAppear(animated: Bool) {} 方法内设置代理: navigationController!.delegate = self,区别只是在于多实现一个代理方法:
1
2
3
4
5
6
7
8
9
10
11
12
13
14
15
16
17
18extension SecondViewController: UINavigationControllerDelegate {
func navigationController(navigationController: UINavigationController, animationControllerForOperation operation: UINavigationControllerOperation, fromViewController fromVC: UIViewController, toViewController toVC: UIViewController) -> UIViewControllerAnimatedTransitioning? {
if operation == UINavigationControllerOperation.Pop {
return ExplodeAnimator()
} else {
return nil
}
}
func navigationController(navigationController: UINavigationController, interactionControllerForAnimationController animationController: UIViewControllerAnimatedTransitioning) -> UIViewControllerInteractiveTransitioning? {
if animationController is ExplodeAnimator {
return self.percentDrivenTransition
} else {
return nil
}
}
}
大功告成,
效果展示:
代码地址: CodeDemo。
IBAnimatable 源码的实现基于高度的封装,这也是望尘莫及的地方。